
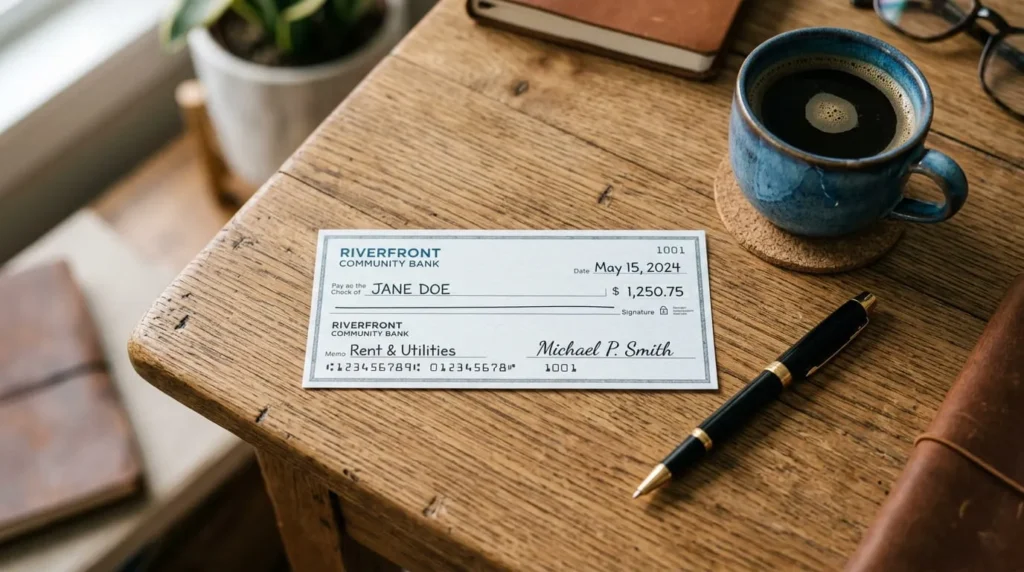

A check looks simple until you actually need to read one carefully. Maybe a client just handed you a check for a large invoice, or a family member mailed you one as a gift, and you want to be sure everything on it is filled out correctly before you deposit it. Learning how to read a cheque means knowing what each line, number, and box actually represents, not just where the blank spaces are. Every check carries the same core set of details: who gets paid, how much, when, and which account the money comes from. Once you know where to look, spotting a mistake, a missing signature, or a number that doesn’t match takes seconds. This guide walks through every part of a check, in the order your eye naturally moves across it.
Check or Cheque? Why the Spelling Doesn’t Change What You’re Reading
You will most often see the word spelled “check” in everyday banking, while “cheque” shows up more in international writing and older banking documents. Both words describe the same piece of paper: a written order telling a bank to pay a specific amount to a specific person. The spelling has no effect on the layout, the numbers, or the legal weight of the document. If you searched for how to read a cheque and landed here expecting something different from a check, you can relax. Every part covered below applies whether the word printed on the page reads “check” or “cheque.”
The Front of a Check: What You Fill In and Verify
The front of a check holds six sections that anyone reading or writing one needs to check every time. Miss one and the check can bounce, get rejected at deposit, or sit unexplained in a drawer because nobody can tell what it was for.
1: Payee Line
The payee line usually starts with “Pay to the Order of” and names the person or business receiving the money. This name has to match, or reasonably match, the identity of whoever is trying to cash or deposit the check. A misspelled name, a nickname instead of a legal name, or a blank payee line can all cause a bank to refuse it. If you’re the one writing the check, use the recipient’s full legal name.
2: Date Line
The date line sits near the top right, close to the payee line, and records the day the check was written. Banks generally will not accept a check dated more than six months earlier, often called a stale check. A check dated in the future is a post-dated check, and while some banks honor that date and hold the funds, most treat a signed check as payable the moment it arrives, regardless of what date is written. If a date looks wrong, missing, or altered, that’s worth a second look before you deposit anything.
3: Dollar Amount, Numeral and Written
Every check states the amount twice: once as a number in a small box, and once written out in words along a line below it. If the two don’t match, banks typically rely on the written amount, since numerals are easier to alter. When writing a check, keep both amounts exact and leave no blank space that someone could use to add extra digits or words. When reading a check someone gave you, always compare the two amounts before assuming you know how much you’re actually receiving.
4: Signature Line
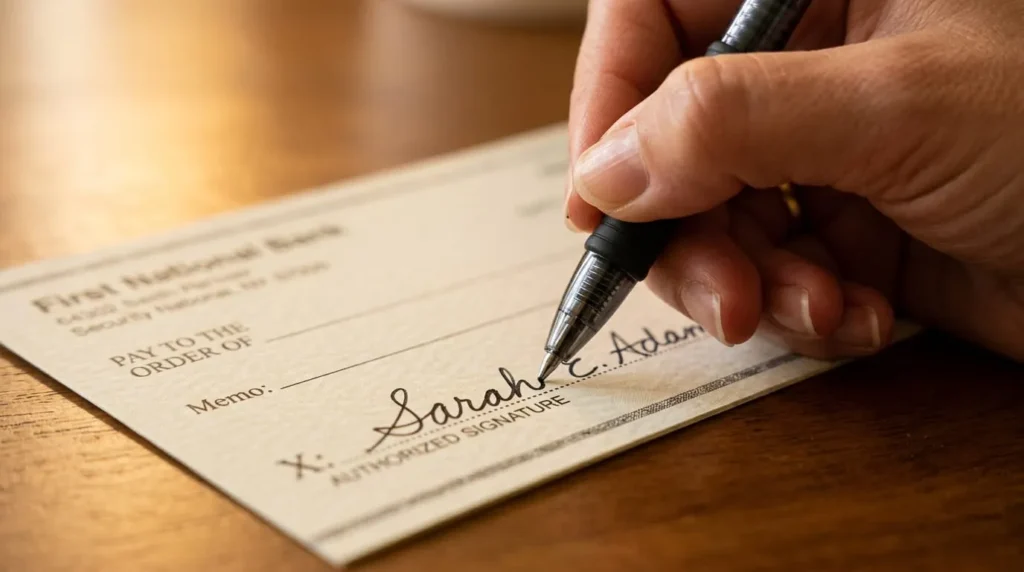
The signature sits in the bottom right corner and is what makes the check valid. Without it, a bank will not process the check, no matter how correctly everything else is filled in. If you’re accepting a check, a signature that looks rushed, doesn’t match the printed name, or is missing entirely is reason enough to ask questions before depositing it.
5: Memo Line
The memo line sits in the bottom left corner and is optional. People use it to note what the payment is for, like “March rent” or “invoice 1042.” It has no effect on whether the bank processes the check, but it makes your own records, and the payee’s records, much easier to sort through later.
The Bottom of a Check: Reading the Routing, Account, and Check Numbers
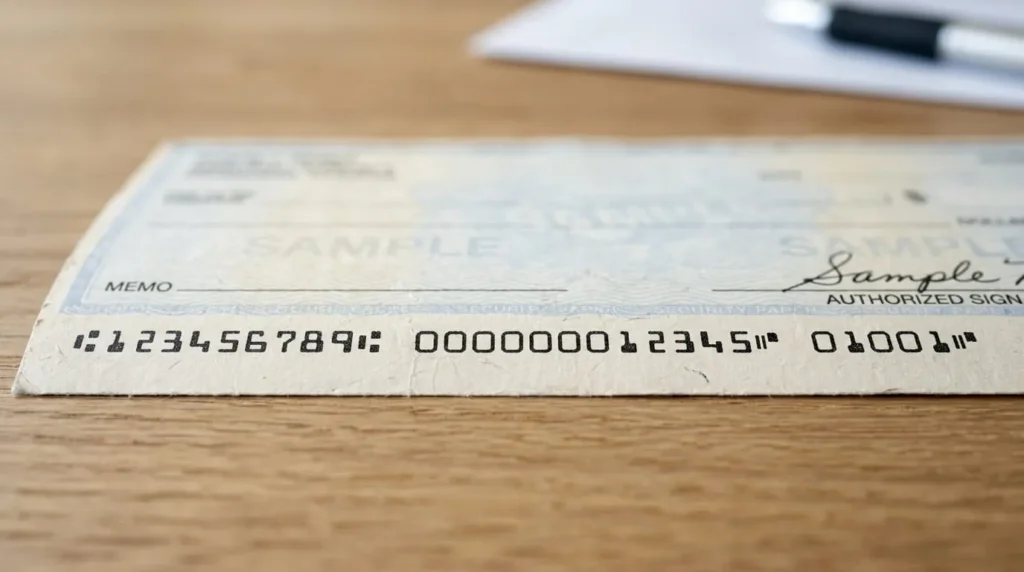
Along the very bottom edge, printed in a distinct magnetic-ink font, sits a line of numbers that does the real work of moving money. That routing number is worth understanding on its own, since it’s what a routing number actually does behind the scenes for every transfer. Banks call this the MICR line, and it’s what gets scanned every time a check passes through a bank’s processing system.
1: Routing Number
The routing number is the first set of digits on the bottom line, always nine digits long. It identifies the specific bank the account belongs to, not the individual account itself. Every bank has its own routing number, and some larger banks use different routing numbers for different regions. You’ll need this number any time you set up direct deposit, an automatic bill payment, or a wire transfer into that account.
2: Account Number
Right after the routing number sits the account number, usually somewhere between eight and twelve digits. This identifies the exact account the money will come out of. Unlike the routing number, which is shared by every customer at that bank, the account number is unique to you. Double check every digit when copying it into a form, since a single wrong number can send a payment to a stranger’s account.
3: Check Number
The check number appears twice: once in the upper right corner in regular print, and again as the last set of digits on the MICR line. It’s usually three or four digits and increases by one with each check you write. A missing or repeated check number in your records is often the first sign that a check went missing or was voided.
What to Do When the Numbers on a Check Don’t Match
Sometimes the numeral amount and the written amount disagree, or a digit in the account number is smudged and hard to read. When the numeral and written amounts conflict, banks generally treat the written, spelled-out amount as the correct one, since it’s harder to alter than a number in a box. If a routing or account number is unclear, most banks will hold or return the check rather than guess. Your safest move as a payee is to contact whoever wrote the check and ask for a corrected or reissued one, rather than depositing something you can’t fully read. Trying to fix or write over any part of a check you didn’t originally fill out can get it rejected, or raise fraud concerns with the bank.
How to Spot a Check That Isn’t Right
Most checks you’ll ever handle are completely legitimate, but knowing what a normal check looks like makes it easier to notice one that isn’t. Genuine checks are printed on textured paper rather than thin copy paper, and the numbers along the bottom sit in a slightly blocky, uniform font instead of a font that matches typical word processing software. The payee name, amount, and signature should all look like they were added at the same time, in similar ink, rather than showing mixed inks or handwriting styles that suggest the check was altered after it was written. Watch for a routing number that doesn’t correspond to any real bank, an account number that’s unusually short, or a check number that repeats one you’ve already seen from the same person. If anything about a check feels inconsistent, your bank can verify it before you deposit or cash it, which is always safer than guessing.
Reading a Check to Set Up Direct Deposit or Autopay
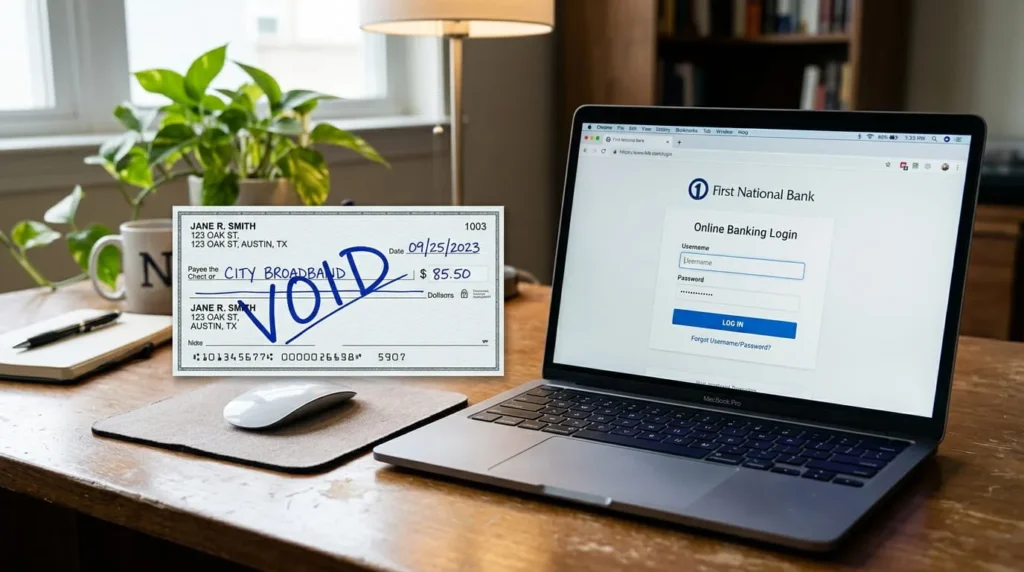
Employers, landlords, and utility companies often ask for a voided check instead of just your account and routing numbers. A voided check is simply a check from your account with “VOID” written across the front in ink, so it can’t be cashed, while the printed routing and account numbers along the bottom stay fully legible. This lets whoever is setting up the payment copy the numbers directly, rather than relying on you to type them correctly. If you don’t have physical checks on hand, most banks let you generate a digital voided check or a direct deposit form through online banking, which shows the same routing and account information in a printable format.
Quick Reference: How to Read a Check in Order
Once you know what each section means, reading any check takes under a minute.
1: Note the check number for your own records.
2: Confirm the payee name matches who’s actually receiving the money.
3: Check the date, and make sure it isn’t more than six months old.
4: Compare the numeral amount to the written amount.
5: Look for a signature that appears genuine and complete.
6: Read the memo line for context, if one is filled in.
7: Verify the routing number identifies a real bank.
8: Check the account number for legibility and length.